How do I deploy my Symfony API - Part 3 - Infrastructure
This is the third article from a series of blog posts on how to deploy a symfony PHP based application to a docker swarm cluster hosted on Amazon EC2 instances. This post focuses on the AWS and instances configuration.

This is the third post from a series of posts that will describe the whole deploy process from development to production. The first article is available here and the second here.
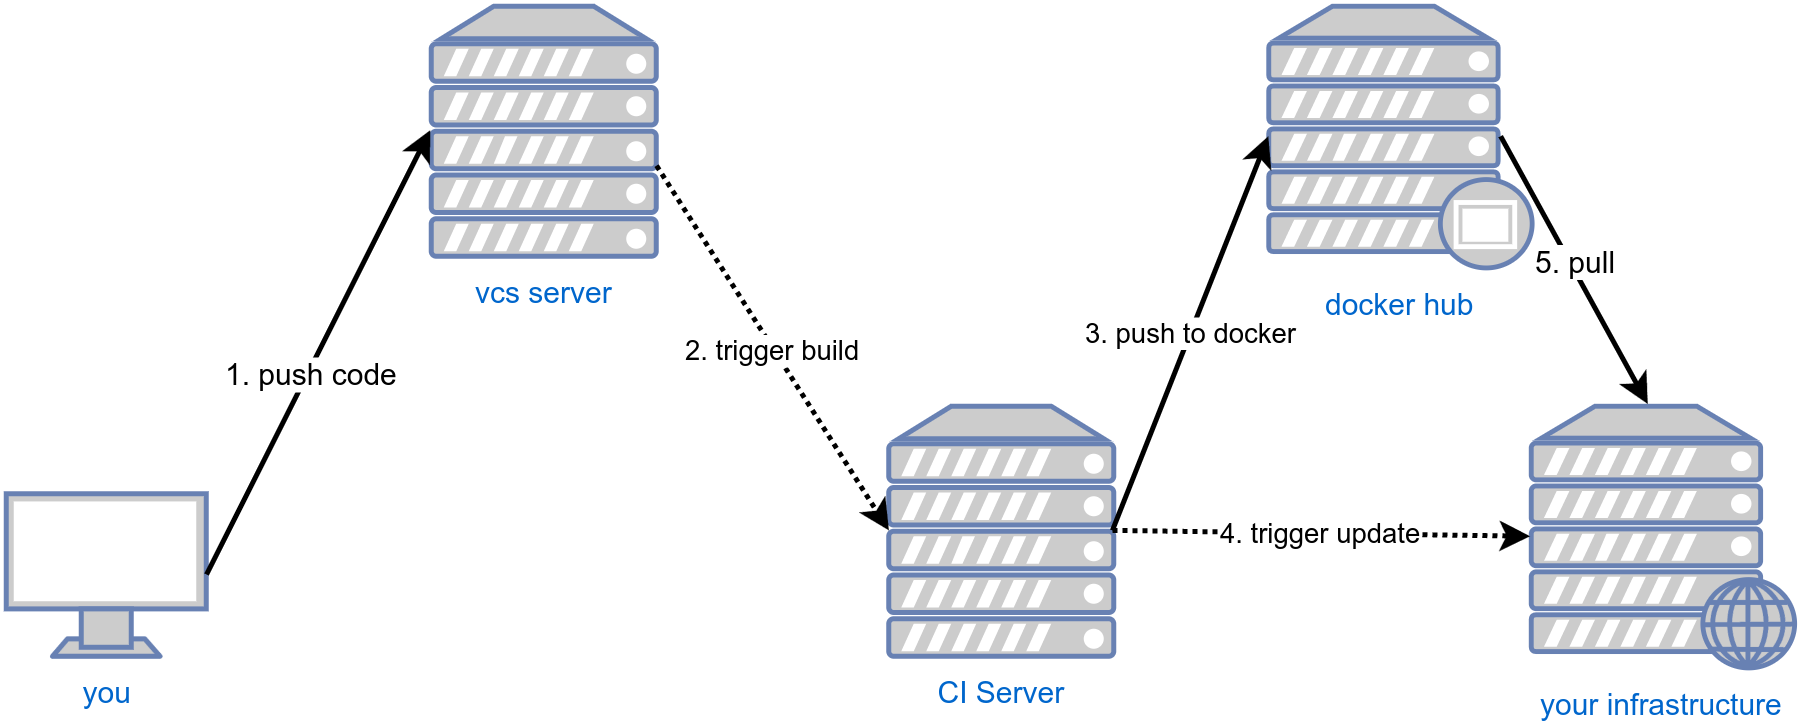
In the previous two articles I've covered the steps 1-3 from the schema here below. Before being able to discuss the steps 4-5 we will need to see how to configure the instances properly to be able to deploy our application to a docker-swarm cluster with rolling updates.

Database
The database (PostgreSQL) used for the application was a simple AWS RDS instance.
The configuration is pretty simple and requires few steps to be put in place. I've not used an home-made postgres installation with or without docker just because the AWS solution works well and for few $$ more offers you security and scalability.
Docker swarm
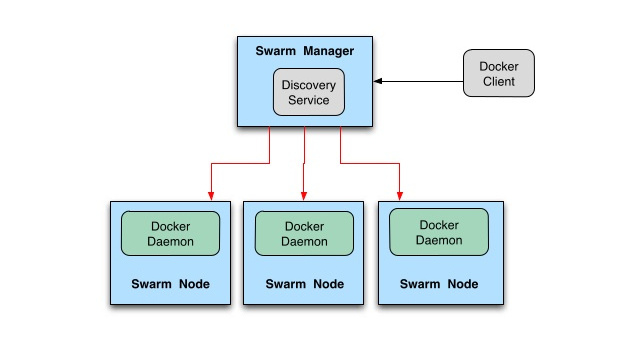
Docker swarm is a specific docker configuration that allows you to see a group of physical or virtual machines as a single one. It allows you to deploy docker images on it as on an ordinary docker engine, but the load will be distributed across multiple nodes.
This is a very simplified and probably imprecise definition, but personally, to me it gives the idea of what docker swarm does.
Docker swarm has one or many manager nodes (the one that decides who does what) and zero or many worker nodes (the one who can only do the job). To not waste resources, manager nodes act also as workers too (so they take jobs too).

From outside, requesting http://node1/service1 or http://node2/service1 or http://node3/service1
makes no difference since the request will be internally re-routed randomly to one of the nodes
part of the docker swarm cluster that hosts the service1.
Note that service1 can be running on multiple nodes at the same time, is up to the developer make sure to have always
a consistent application state (as example by implementing stateless services or having a shared state storage).
AWS configuration
Here are some important details about the AWS and VPC configuration that are necessary do know in order to understand better the article, but are out of the scope for this series of posts.
- The AWS VPC had the internal DNS resolution enabled.
- There was a VPN configured to access the VPC from outside (
openvpnwas installed on an instance on a public subnet) and the commands executed here imply being connected to the VPN. - The VPC internal DNS was pushed down to VPN clients by allowing them to resolve AWS internal IPs.
- AWS security groups were properly configured (this was the biggest headache!).
All the nodes were exposing the port 80 and using a ELB (Elastic load balancer) was possible to distribute the load across the cluster.
If somebody is interested to go deeper into one of the topics, just let me know, can be a good topic for one the next posts.
Instance spin-up and type
As said, the application was hosed on AWS, more precisely a region with 3 adaptability zones (more info on this here). The 3 availability zones are an important fact for a fault-tolerance of a swarm cluster as explained here.
I've used two separate Auto Scaling Groups, one for the manager nodes and one for the worker nodes.
- Manager nodes Auto Scaling Group: configured to have always one node per availability zone.
- Worker nodes Auto Scaling Group: configured to have 1 or more nodes depending on the CPU usage.
Each node, when spinning up was executing a simple bash script (AWS User data scripts), that was allowing to run some specific node configurations and decide if a node is manager or a worker.
Manager nodes
As said, manager nodes in a swarm cluster responsible in managing the cluster state. For more detail on administrating manager nodes, here is a great overview of what might be necessary to know.
Manager nodes had a Private Hosted Zone.
On creation (in the user data script), manager nodes were registering them self in a private hosted zone,
more specifically, manager nodes were setting their IP into a record myapp-manager.yyy.local
(instead of "myapp-manager.yyy.local" I've used obviously something more meaningful).
myapp-manager.yyy.local was a record with a
Failover routing policy.
AWS health checks were making sure to not return records for not healthy nodes.
This made possible to have always a docker swarm manager available at that address/name.
Here the script that was executed for on each manager node creation.
#!/bin/bash -v
set -ex

HOSTED_ZONE_ID='xxx'
HOSTED_ZONE_RECORD='myapp-manager.yyy.local'

# install basics
apt-get update -y -m && apt-get upgrade -y -m
apt-get -y install awscli curl > /tmp/userdata.log

# docker installation
curl -fsSL https://download.docker.com/linux/ubuntu/gpg | apt-key add -
add-apt-repository "deb [arch=amd64] https://download.docker.com/linux/ubuntu $(lsb_release -cs) stable"
apt-get update -q -y && apt-get install -y docker-ce

# configure docker swarm
if nc "$HOSTED_ZONE_RECORD" 2377 < /dev/null -w 10; then #
    # join the cluster as manager
    docker swarm join --token $(docker -H "$HOSTED_ZONE_RECORD" swarm join-token -q manager);
else
    # create the swarm
    docker swarm init;
fi

# update DNS
IP=$(curl http://169.254.169.254/latest/meta-data/local-ipv4)

echo "
{
    \"Comment\": \"Update record for manager node\",
    \"Changes\": [
        {
            \"Action\": \"UPSERT\",
            \"ResourceRecordSet\": {
                \"Name\": \"$HOSTED_ZONE_RECORD.\",
                \"Type\": \"A\",
                \"TTL\": 300,
                \"ResourceRecords\": [
                    {
                        \"Value\": \"$IP\"
                    }
                ]
            }
        }
    ]
}
" > /tmp/change-resource-record-sets.json
aws route53 change-resource-record-sets --hosted-zone-id "$HOSTED_ZONE_ID" --change-batch file:///tmp/change-resource-record-sets.json

exit 0;
Let's analyze what this script does:
- We have some basic system setup as the
curlinstallation and package updates. - Then Docker is installed via its official packages (the underlying distribution was a recent Debian)
- The docker swarm cluster configured:
- If there is a host listening on
myapp-manager.yyy.local:2377means that the cluster is running and the node has to join a swarm and does is using thedocker swarm joincommand.
The commanddocker -H "$HOSTED_ZONE_RECORD" swarm join-token -q managerconnects to a currently running manager and retrieves the token necessary to join the cluster as a manager. - If there are no nodes listening on
myapp-manager.yyy.local:2377means that the cluster has not yet been created and the current node is the responsible for creating the cluster, so it does.
- If there is a host listening on
- Using the AWS client, the node register it self to the DNS record
myapp-manager.yyy.local, so newly created managers can connect to it when crated by the auto scaling group.
With this script our manager was ready to host new docker containers and was reachable via myapp-manager.yyy.local DNS
name.
We can check how it went the cluster creation operation by running the following command.
docker -H myapp-manager.yyy.local node ls
The output should be something as:
ID                           HOSTNAME  STATUS  AVAILABILITY  MANAGER STATUS
cer8w4urw 8yxrwzr987wyrzw    node3     Ready   Active        Reachable
ecru45c8m5uw358xmw0x68cw8    node2     Ready   Active        Reachable
ecruw490rx4w8w4ynw4vy9wv4 *  node1     Ready   Active        Leader
In this example the command was executed from an instance outside of a cluster,
for that reason, the option -H myapp-manager.yyy.local was used.
If the command was executed from a shell inside one of the managers, the -H option will be not necessary
Worker nodes
In a swarm cluster worker nodes run containers assigned to them by the manager nodes.
Here is the script executed on node creation.
#!/bin/bash -v
set -ex

HOSTED_ZONE_RECORD='myapp-manager.yyy.local'

# install basics
apt-get update -y -m && apt-get upgrade -y -m
apt-get -y install curl > /tmp/userdata.log

# docker installation
curl -fsSL https://download.docker.com/linux/ubuntu/gpg | apt-key add -
add-apt-repository "deb [arch=amd64] https://download.docker.com/linux/ubuntu $(lsb_release -cs) stable"
apt-get update -q -y && apt-get install -y docker-ce

# join the cluster as worker
docker swarm join --token $(docker -H "$HOSTED_ZONE_RECORD" swarm join-token -q worker);

exit 0;
Let's analyze what the worker script does:
- We have some basic system setup as the
curlinstallation and package updates. - Then Docker is installed via its official packages (the underlying distribution was a recent Debian)
- The docker swarm cluster configured:
- The worker joins the cluster using the
docker swarm joincommand.
The commanddocker -H "$HOSTED_ZONE_RECORD" swarm join-token -q workerconnects to a currently running manager and retrieves the token necessary to join the cluster as a worker.
- The worker joins the cluster using the
When this script completes the worker is part of the cluster.
We can check how it went the worker creation operation by running the following command.
docker -H myapp-manager.yyy.local node ls
The output should be something as:
ID                           HOSTNAME  STATUS  AVAILABILITY  MANAGER STATUS
8j34r9j3498rj34f9n34f9448    node4     Ready   Active
cer8w4urw 8yxrwzr987wyrzw    node3     Ready   Active        Reachable
ecru45c8m5uw358xmw0x68cw8    node2     Ready   Active        Reachable
ecruw490rx4w8w4ynw4vy9wv4 *  node1     Ready   Active        Leader
We can see here a node node4 as worker.
Conclusion
In this article I've explained how AWS and the VPC was configured. Now the instances are ready to receive the docker images to run.
Even in this case there are many gray areas that require attention and improvement, but the project was in a very early stage and some aspects had to be postponed.
Some of the improvements I can easily spot are:
- Use custom AMI with pre-installed and up to date docker to have faster the spin-up time.
- Handle the container re-balancing when the auto scaling group creates a worker node.
- The use of an ELB and the way how docker-swarm works (the traffic is internally re-balanced) changes partially the aim of a load balancer (suggestions are welcome!).
- When the cluster is scaling down, drain
the nodes to make sure to not "kill" active connections
and gracefully leave the cluster.
Possible ways to do it in my opinion are available here or here - When a node just "dies" without executing any maintenance script, will be seen by the cluster as "Unavailable" and needs to be manually removed. Not sure how this can be automated.
- An alternative to AWS DNS to be used for manager discover can be Consul
Most probably many other things can be improved but it depends a lot on specific use cases.
In the next article we will se how will be possible to deploy the application prepared in the first two articles.
As usual, I'm always happy to hear constructive feedback and to learn what else can be improved in the above explained setup.